Test Env.
HW : jetson AGX Xavier, Arduino Uno
SW : jetpack 4.5.1 (Ubuntu 18.04, ROS Melodic, CUDA 10.2, cuDNN 8.0)
1. Install package
$ sudo apt-get install ros-melodic-rosserial-arduino
$ sudo apt-get install ros-melodic-rosserial
2. Install Arduino IDE
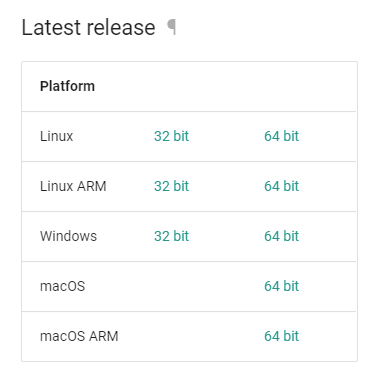
- Download Arduino IDE
https://www.arduino.cc/en/Main/Software
Software
Open-source electronic prototyping platform enabling users to create interactive electronic objects.
www.arduino.cc
또는
$ cd ~/Downloads

# Linux 64bit의 경우
$ sudo wget https://downloads.arduino.cc/arduino-1.8.13-linux64.tar.xz

# Linux ARM64의 경우
$ sudo wget https://downloads.arduino.cc/arduino-1.8.19-linuxaarch64.tar.xz
※ 다른 버전의 경우 다운로드 사이트에서 링크 주소 복사로 경로를 알 수 있음

https://www.arduino.cc/en/software
Software
Open-source electronic prototyping platform enabling users to create interactive electronic objects.
www.arduino.cc
https://arduino.github.io/arduino-cli/0.25/installation/
Installation - Arduino CLI
Installation Several options are available for installation of Arduino CLI. Instructions for each are provided below: Install via Homebrew (macOS/Linux) The Arduino CLI is available as a Homebrew formula since version 0.5.0: brew update brew install arduin
arduino.github.io
- Run the below command
$ cd ~/Downloads
$ tar xf [filename].tar.xz # 해당 파일 풀기
$ mv -f [arduino_forder] ~/ # 홈 경로로 폴더 이동
$ cd ~/[arduino_forder]
$ sudo ./install.sh
3. Install ROS library
$ cd [arduino_path]/libraries
$ rosrun rosserial_arduino make_libraries.py .
you can see ros_lib folder has been created
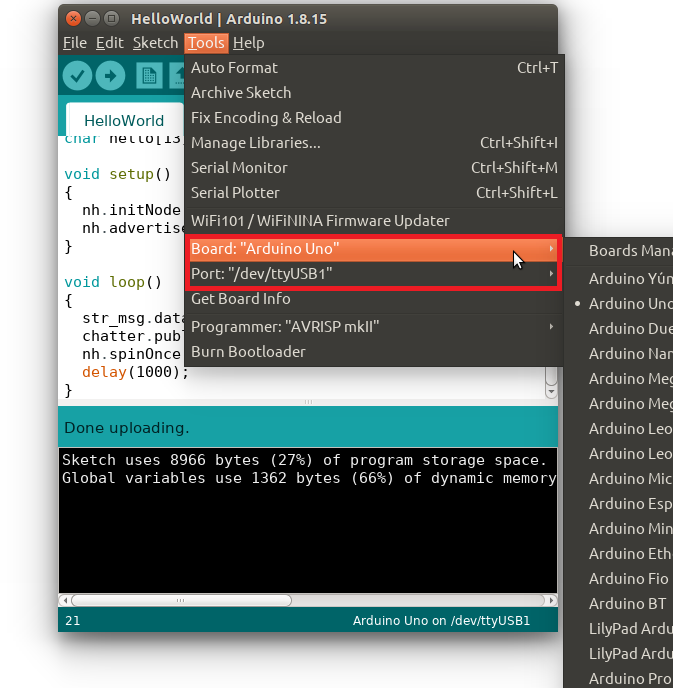
4. Run Arduino
- Run arduino
$ arduino- set board and port
- Change Permissions
$ sudo chmod 666 /dev/ttyUSB1
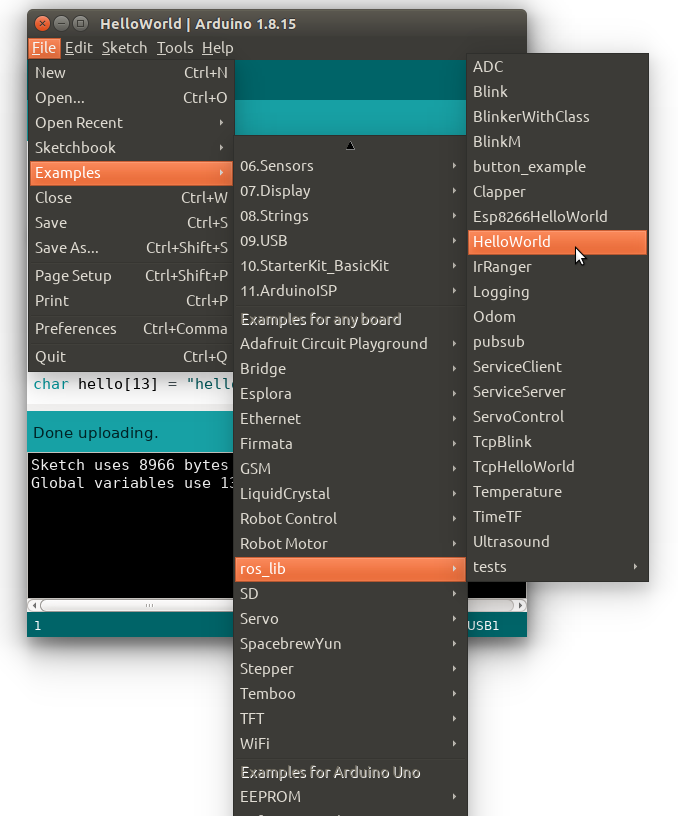
5. Run example file
- Open hello world example and Upload
 /*
 * rosserial Publisher Example
 * Prints "hello world!"
 */

#include <ros.h>
#include <std_msgs/String.h>

ros::NodeHandle  nh;

std_msgs::String str_msg;
ros::Publisher chatter("chatter", &str_msg);

char hello[13] = "hello world!";

void setup()
{
  nh.initNode();
  nh.advertise(chatter);
}

void loop()
{
  str_msg.data = hello;
  chatter.publish( &str_msg );
  nh.spinOnce();
  delay(1000);
}
6. Run ROS
- Run the command
# 1st terminal
$ roscore

# 2nd terminal
$ rosrun rosserial_python serial_node.py _port:=/dev/ttyUSB1 _baud:=57600

# 3rd terminal
$ rostopic echo chatter
you can see the result
$ rostopic echo chatter
data: "hello world!"
---
data: "hello world!"
---
data: "hello world!"
---
data: "hello world!"
---
data: "hello world!"
---
ref.
https://happyobo.github.io/ros/%EC%95%84%EB%91%90%EC%9D%B4%EB%85%B8/ros7-post/
[ROS] 아두이노에서 ROS사용하기
아두이노에서 ROS사용하기
happyobo.github.io