[VScode] VScode로 SSH를 통해 원격서버 접속하기
VScode로 SSH를 통해 원격서버 접속하기
이번에는 visual studio code로 SSH를 통해 원격서버에 접속하여 remote 방법을 알아보겠습니다.
0. VScode 설치
https://code.visualstudio.com/download
Download Visual Studio Code - Mac, Linux, Windows
Visual Studio Code is free and available on your favorite platform - Linux, macOS, and Windows. Download Visual Studio Code to experience a redefined code editor, optimized for building and debugging modern web and cloud applications.
code.visualstudio.com
1. Remote Development
1) Extensions에서 Remote Development 설치
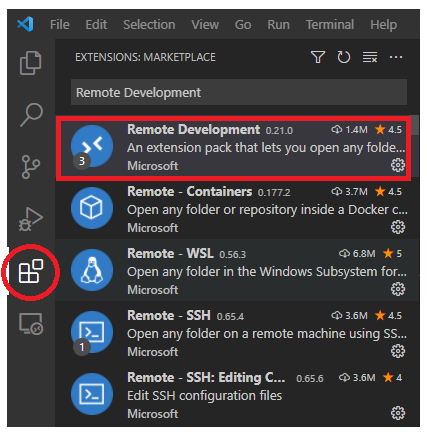
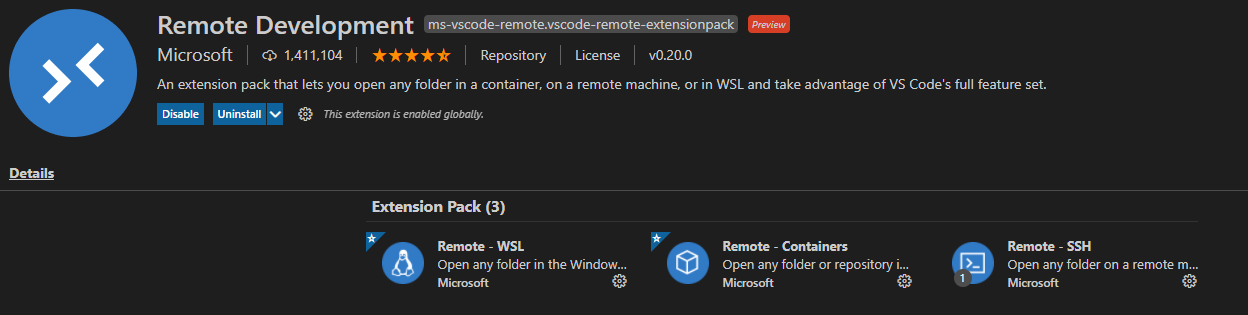
Remote-WSL, Remote-Containers, Remote-SSH가 자동적으로 같이 설치됩니다.
2) Remote Explorer에서 SSH Targets를 선택 후, Add New 클릭
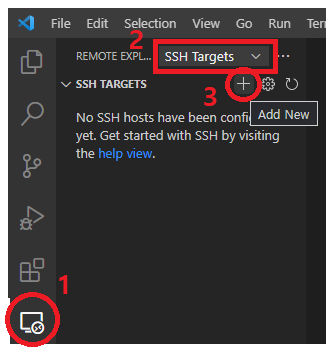
또는, 2) Remote-SSH: Connect to Host... 실행

ADD New SSH Host... 실행

3) ssh [계정]@[ip주소] 입력

만약 접속하고자 하는 서버의 기본 port인 22번이 아니라면,
아래의 Extra1-3)을 확인하여 Port 추가
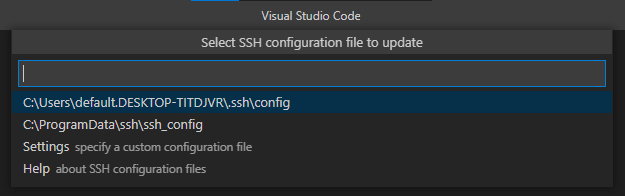
4) SSH configuration file을 저장할 장소 선택
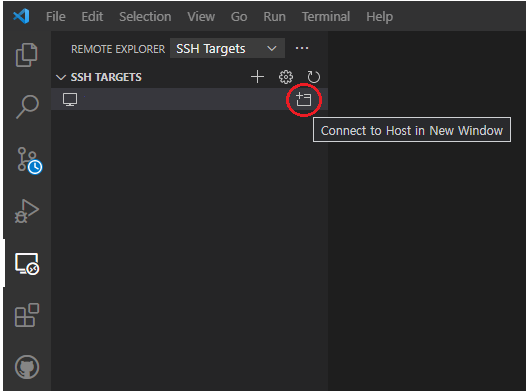
2. Remote 실행하기
1) Remote Explore에서 Connect to Host in New Window 선택
2) 서버 Platform 선택(Linux, Window, macOS)

3) 비밀번호 입력

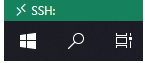
4) 실행 확인 (좌측 하단)
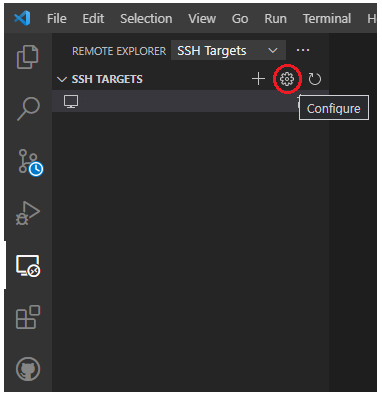
Extra 1. Remote Explore에 별명으로 표시
1) Remote Explore에서 해당 SSH TARGETS을 선택하고 Configure 선택
2) SSH configuration file 선택

3) Host의 값 수정 후 저장
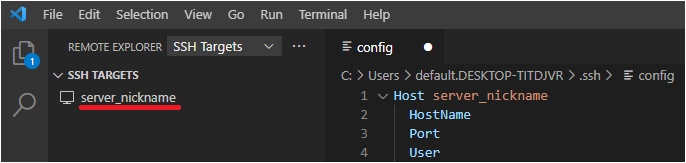
- Host : vscode 내의 별명
- HostName : 서버주소
- Port : 다른 port 설정 (언급이 없다면 default : 22)
- User : 서버접속계정
Extra 2. 비밀번호 입력없이 바로 접속하기
1) Windows PowerShell(Windows) 또는 Termial(Ubuntu)에서 아래의 명령 실행
ssh-keygen -t rsa -b 4096

2) 아래의 명령 실행 (<user>와 <host>는 각자의 계정과 ip주소 입력)
cat ./.ssh/id_rsa.pub | ssh <user>@<host> "mkdir -p ~/.ssh && touch ~/.ssh/authorized_keys && chmod -R go= ~/.ssh && cat >> ~/.ssh/authorized_keys"

ref.
code.visualstudio.com/docs/remote/ssh
Developing on Remote Machines using SSH and Visual Studio Code
Developing on Remote Machines or VMs using Visual Studio Code Remote Development and SSH
code.visualstudio.com
https://code.visualstudio.com/blogs/2019/10/03/remote-ssh-tips-and-tricks
Visual Studio Code Remote SSH Tips and Tricks
Visual Studio Code Remote-SSH Tips and Tricks
code.visualstudio.com
vscode를 활용하여 원격 서버에 연결하기
회사에서 서버를 사용할 때, putty를 활용하는데 IDE를 사용하고 싶다는 생각이 문득 들어서 찾아보니 vscode는 community 버전을 활용해도 서버랑 원격 접속을 할 수 있더군요! 그래서 오늘은 윈도우
seokhyun2.tistory.com